Part 4: Build and Test
In this section, you'll learn the plugin development cycle: building, testing, installing locally, and using your plugin in a workflow.
Starting from here?
If you're joining at this part, copy the solution from Part 3 to use as your starting point:
Then change into the plugin directory:
Why do we need to build?
If you're used to scripting languages like Python, R, or even Nextflow's DSL, you might wonder why we need a "build" step at all. In those languages, you write code and run it directly.
Nextflow plugins are written in Groovy, which runs on the Java Virtual Machine (JVM). JVM languages need to be compiled before they can run. The human-readable source code is converted into bytecode that the JVM can execute.
The build process:
- Compiles your Groovy code into JVM bytecode
- Packages it into a JAR file (Java ARchive, like a ZIP of compiled code)
- Bundles metadata so Nextflow knows how to load the plugin
The build tools handle all this automatically.
Run make assemble and let Gradle do the work.
1. The development cycle
The plugin development cycle follows a simple pattern:
graph LR
    A[Write/Edit Code] --> B[make assemble]
    B --> C[make test]
    C --> D{Tests pass?}
    D -->|No| A
    D -->|Yes| E[make install]
    E --> F[Test in pipeline]
    F --> G{Works?}
    G -->|No| A
    G -->|Yes| H[Done!]
2. Build the plugin
The Makefile provides convenient commands:
Or directly with the Gradle wrapper:
What is ./gradlew?
The ./gradlew script is the Gradle wrapper, a small script included with the project that automatically downloads and runs the correct version of Gradle.
This means you don't need Gradle installed on your system.
The first time you run ./gradlew, it will download Gradle (which may take a moment), then run your command.
The make commands in the Makefile are just shortcuts that call ./gradlew for you.
Build output
The first time you run this, Gradle will download itself (this may take a minute):
Downloading https://services.gradle.org/distributions/gradle-8.14-bin.zip
...10%...20%...30%...40%...50%...60%...70%...80%...90%...100%

Welcome to Gradle 8.14!
...

Deprecated Gradle features were used in this build...

BUILD SUCCESSFUL in 23s
4 actionable tasks: 4 executed
The warnings are expected.
- "Downloading gradle...": This only happens the first time. Subsequent builds are much faster.
- "Deprecated Gradle features...": This warning comes from the plugin template, not your code. It's safe to ignore.
- "BUILD SUCCESSFUL": This is what matters. Your plugin compiled without errors.
3. Write unit tests
A successful build means the code compiles, but not that it works correctly. Tests verify your functions behave as expected and help catch bugs when you make changes later.
What are unit tests?
Unit tests are small pieces of code that automatically check if your functions work correctly. Each test calls a function with known inputs and checks that the output matches what you expect.
For example, if you have a function that reverses strings, a test might check that reverse("Hello") returns "olleH".
Tests are valuable because:
- They catch bugs before users do
- They give you confidence to make changes without breaking things
- They serve as documentation showing how functions should be used
You don't need to write tests to use a plugin, but they're good practice for any code you plan to share or maintain.
The generated project includes a test for the Observer class, but we need to create a new test file for our extension functions.
3.1. Understanding Spock tests
The plugin template uses Spock, a testing framework for Groovy that reads almost like plain English. Here's the basic structure:
def 'should reverse a greeting'() {   // (1)!
    given:                             // (2)!
    def ext = new GreetingExtension()

    expect:                            // (3)!
    ext.reverseGreeting('Hello') == 'olleH'
}
- Test name in quotes: Describes what the test checks. Use plain English.
given:block: Set up what you need for the test (create objects, prepare data)expect:block: The actual checks. Each line should betruefor the test to pass
This structure makes tests readable: "Given an extension object, expect that reverseGreeting('Hello') equals 'olleH'."
3.2. Create the test file
Open it in your editor and add the following content:
4. Run the tests
Or:
Test output
Where are the test results? Gradle hides detailed output when all tests pass. "BUILD SUCCESSFUL" means everything worked. If any test fails, you'll see detailed error messages.
5. View the test report
To see detailed results for each test, you can view the HTML test report that Gradle generates.
Start a simple web server in the test report directory:
VS Code will prompt you to open the application in your browser. Click through to your test class to see individual test results:
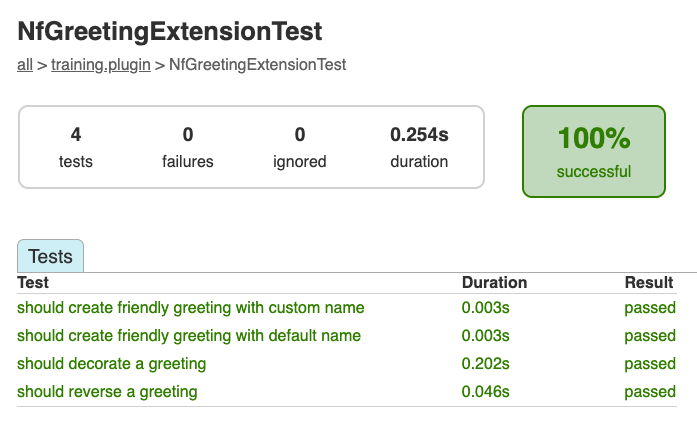
The report shows each test method, its duration, and whether it passed or failed. This confirms that all four of our greeting functions are being tested correctly.
Press Ctrl+C in the terminal to stop the server when you're done, then return to the plugin directory:
If the build fails
Build errors can be intimidating, but they usually point to a specific problem. Common issues include:
- Syntax errors: A missing bracket, quote, or semicolon. The error message usually includes a line number.
- Import errors: A class name is misspelled or the import statement is missing.
- Type errors: You're passing the wrong type of data to a function.
- "cannot find symbol": You're using a variable that wasn't declared. Check that you've added the instance variable (e.g.,
private String prefix) before using it.
Read the error message carefully. It often tells you exactly what's wrong and where. If you're stuck, compare your code character-by-character with the examples.
Common runtime issues
Even if the build succeeds, you might encounter issues when running:
- "Plugin not found": Did you run
make install? The plugin must be installed locally before Nextflow can use it. - "Unknown function": Check that you've imported the function with
include { functionName } from 'plugin/nf-greeting'. - Wrong directory: Make sure you're in the right directory. Use
pwdto check, andcd ..orcd nf-greetingas needed. - IDE showing errors: The VS Code Nextflow extension may show warnings for plugin imports. If the build succeeds and Nextflow runs correctly, you can ignore these.
6. Install locally
Tests pass, so the plugin is ready to use. To make it available to Nextflow, install it to your local plugins directory:
Expected output
> Task :installPlugin
Plugin nf-greeting installed successfully!
Installation location: /home/codespace/.nextflow/plugins
Installation location determined by - Default location (~/.nextflow/plugins)

BUILD SUCCESSFUL in 1s
The exact path will vary depending on your environment, but you should see "Plugin nf-greeting installed successfully!" and "BUILD SUCCESSFUL".
This copies the plugin to $NXF_HOME/plugins/ (typically ~/.nextflow/plugins/).
7. Use your plugin in a workflow
With the plugin installed locally, you can use it in a Nextflow pipeline.
7.1. Configure the plugin
Go back to the pipeline directory:
Edit nextflow.config to replace the nf-hello plugin with our new nf-greeting plugin:
We're replacing nf-hello with nf-greeting because we want to use our own plugin's functions instead.
What about random_id_example.nf?
The random_id_example.nf file we modified earlier still imports from nf-hello, so it won't work with this config change.
That's fine. We won't use it again.
We'll work with main.nf from here on.
Version required for local plugins
When using locally installed plugins, you must specify the version (e.g., nf-greeting@0.1.0).
Published plugins in the registry can use just the name.
7.2. Import and use functions
We provided a simple greeting pipeline in main.nf that reads greetings from a CSV file and writes them to output files.
See the starting point
First, run the pipeline as-is to see what we're working with:
Look at the code:
#!/usr/bin/env nextflow

params.input = 'greetings.csv'

process SAY_HELLO {
    input:
        val greeting
    output:
        stdout
    script:
    """
    echo '$greeting'
    """
}

workflow {
    greeting_ch = channel.fromPath(params.input)
                        .splitCsv(header: true)
                        .map { row -> row.greeting }
    SAY_HELLO(greeting_ch)
    SAY_HELLO.out.view { result -> "Output: ${result.trim()}" }
}
Update the workflow
Enhance it to use our plugin functions.
Edit main.nf to import and use the custom functions:
The key changes:
- Lines 4-5: Import our plugin functions using
include { function } from 'plugin/plugin-name' - Lines 17-18: Use
decorateGreeting()inside the process script to transform the greeting before output - Lines 28-30: Use
reverseGreeting()in amapoperation to transform channel items in the workflow
Plugin functions work in both process scripts and workflow operations.
7.3. Run the pipeline
Output
N E X T F L O W   ~  version 25.10.2

Launching `main.nf` [elated_marconi] DSL2 - revision: cd8d52c97c

Pipeline is starting! 🚀
executor >  local (5)
[fe/109754] process > SAY_HELLO (5) [100%] 5 of 5 ✔
Reversed: olleH
Reversed: ruojnoB
Reversed: àloH
Reversed: oaiC
Reversed: ollaH
Decorated: *** Hello ***
Decorated: *** Bonjour ***
Decorated: *** Holà ***
Decorated: *** Ciao ***
Decorated: *** Hallo ***
Pipeline complete! 👋
The "Pipeline is starting!" and "Pipeline complete!" messages come from the GreetingObserver trace observer that was included in the generated plugin template.
The decorateGreeting() function wraps each greeting with decorative markers, and reverseGreeting() shows the reversed strings.
Takeaway
You learned that:
- Use
make assembleto compile andmake testto run tests - Install with
make installto use the plugin locally - Import plugin functions with
include { function } from 'plugin/plugin-id' - Plugin functions work in both process scripts and workflow operations
What's next?
The next section explores trace observers for hooking into workflow lifecycle events.