Part 1: Plugin Basics
Before diving into plugin usage and development, this section explains what plugins are and how they extend Nextflow. Then you'll learn how to discover and use existing plugins from the community.
This is the most important part for most users
Even if you never develop your own plugin, knowing how to use existing plugins is valuable. Many powerful features are available through plugins, such as input validation with nf-schema. If plugin development seems daunting, focus on mastering this part first.
1. Plugin architecture
1.1. How plugins extend Nextflow
Nextflow's plugin system is built on PF4J, a lightweight plugin framework for Java. Plugins can extend Nextflow in several ways:
| Extension Type | Purpose | Example |
|---|---|---|
| Functions | Custom functions callable from workflows | samplesheetToList() |
| Executors | Custom task execution backends | AWS Batch, Kubernetes |
| Filesystems | Custom storage backends | S3, Azure Blob |
| Trace Observers | Monitor workflow execution | Custom logging, metrics |
Plugins can enhance Nextflow's functionality without modifying its core code, making them ideal for adding supplementary features to pipelines.
1.2. Why use plugins?
You can define custom functions directly in your Nextflow scripts, so why use plugins?
| Approach | Best for | Limitations |
|---|---|---|
| Local functions | Project-specific logic | Copy-paste between pipelines, no versioning |
| Plugins | Reusable utilities | Requires Java/Groovy knowledge to create |
Plugins are ideal when you need to:
- Share functionality across multiple pipelines
- Extend existing pipelines with extra features (e.g., Slack notifications)
- Version and manage dependencies properly
- Access Nextflow internals (channels, sessions, lifecycle events, etc.)
- Integrate with external infrastructure (cloud platforms, storage systems)
2. Discovering plugins
The Nextflow Plugin Registry is the central hub for finding available plugins. Browse the registry to discover plugins for:
- Input validation and samplesheet parsing
- Cloud platform integration (AWS, Google Cloud, Azure)
- Provenance tracking and reporting
- Notifications (Slack, Teams)
- And more
Each plugin page in the registry shows:
- Description and purpose
- Available versions
- Installation instructions
- Links to documentation and source code
You can also search GitHub for repositories with the nf- prefix, as most Nextflow plugins follow this naming convention.
Explore the registry
Take a few minutes to browse the Nextflow Plugin Registry.
- Find a plugin that provides Slack notifications
- Look at nf-schema. How many downloads does it have?
- Find a plugin that was released in the last month
This familiarity will help you discover useful plugins for your own pipelines.
3. Installing plugins
Plugins are declared in your nextflow.config file using the plugins {} block:
Key points:
- Use the
idkeyword followed by the plugin name - Specify a version with
@version(recommended for reproducibility); if omitted, the latest version is used - Nextflow automatically downloads plugins from the registry at runtime
Local vs published plugins
When you add a plugin to your nextflow.config, Nextflow automatically downloads it from the plugin registry the first time you run your pipeline.
The plugin is then cached locally in $NXF_HOME/plugins/ (typically ~/.nextflow/plugins/).
Later in this training (Parts 3-7), we'll develop our own plugin and install it locally for testing. Part 7 covers how to publish plugins for others to use.
4. Importing plugin functions
Once a plugin is installed, you can import its functions using the familiar include syntax with a special plugin/ prefix:
This imports the samplesheetToList function from the nf-schema plugin, making it available in your workflow.
5. Example: Using nf-schema for validation
The nf-schema plugin is widely used in nf-core pipelines for input validation. Here's how it works in practice:
The samplesheetToList function:
- Reads the input CSV file
- Validates it against a JSON schema
- Returns a list of validated entries
- Throws helpful errors if validation fails
This pattern is used extensively in nf-core pipelines to ensure input data is valid before processing begins.
6. Plugin configuration
Some plugins accept configuration options in nextflow.config:
plugins {
    id 'nf-schema@2.1.1'
}
// Plugin-specific configuration
validation {
monochromeLogs = true
ignoreParams = ['custom_param']
}
Each plugin documents its configuration options. Check the plugin's documentation for available settings.
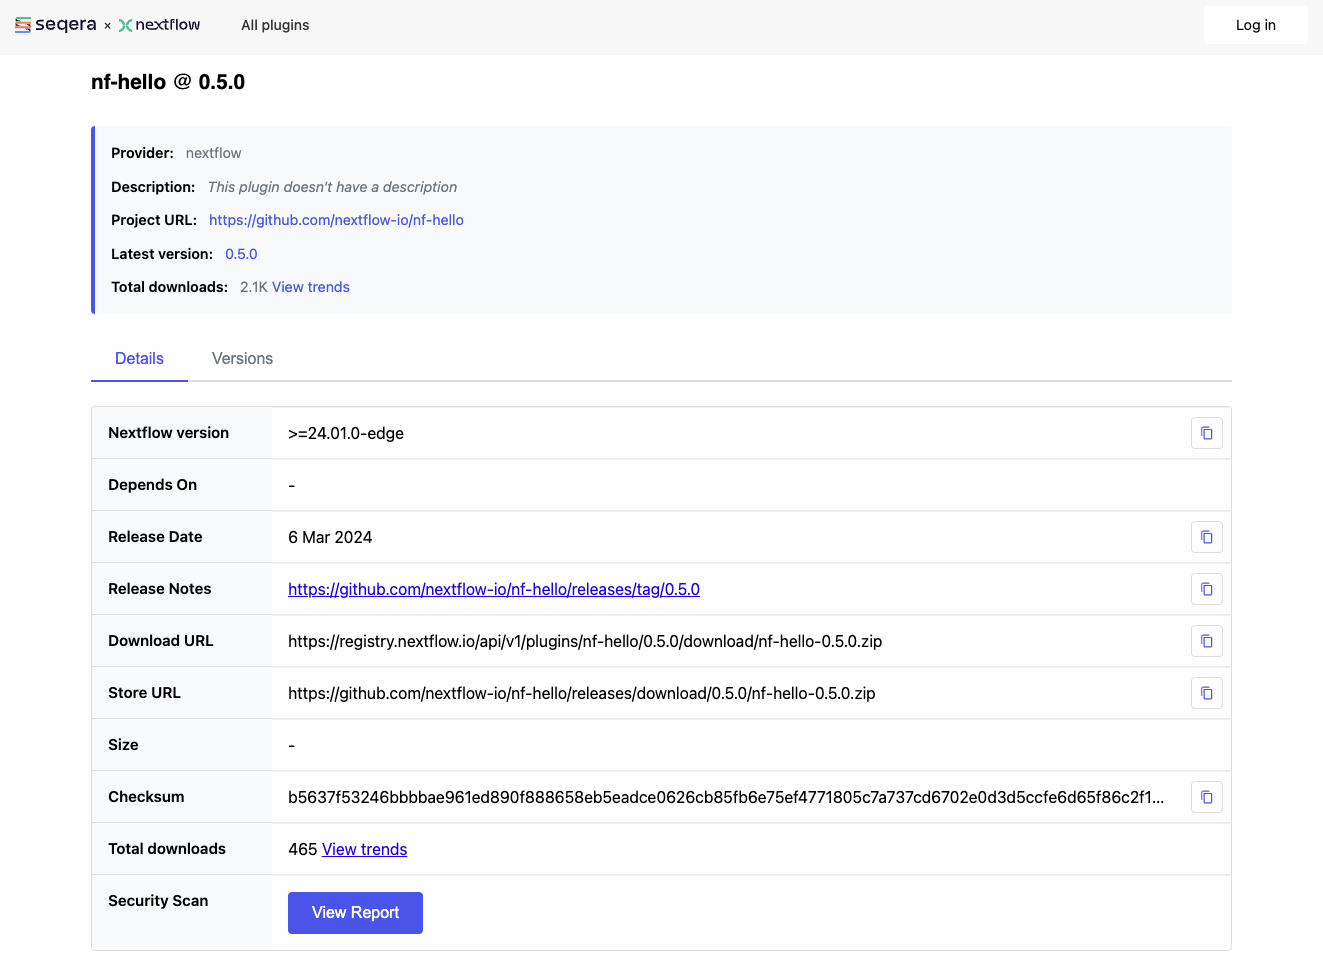
7. Try it: Using the nf-hello plugin
The nf-hello plugin provides a randomString function that generates random strings.
The following example demonstrates using it in a workflow.
7.1. See the starting point
First, look at what we're working with.
The random_id_example.nf file contains a workflow with an embedded randomString function:
Notice the function is defined locally in the file. Run it to see how it works:
This works, but the function is trapped in this file. Now replace it with the plugin version.
7.2. Configure the plugin
Add the plugin to your nextflow.config:
7.3. Use the plugin function
Update random_id_example.nf to use randomString from the plugin:
#!/usr/bin/env nextflow

include { randomString } from 'plugin/nf-hello'

workflow {
    // Generate random IDs for each sample
    Channel.of('sample_A', 'sample_B', 'sample_C')
        .map { sample -> "${sample}_${randomString(8)}" }
        .view()
}
7.4. Run it
Pipeline is starting! 🚀
sample_A_xcwzhtbm
sample_B_yqurtfsq
sample_C_lpxepimu
Pipeline complete! 👋
(Your random strings will be different!)
The first run downloads the plugin automatically.
Any pipeline using nf-hello@0.5.0 gets the exact same randomString function.
Note that we're using a function someone else wrote. The development burden is on the plugin developer, not the pipeline developer. Nextflow also handles installing and updating plugins on your behalf.
Takeaway
You learned that:
- Plugins extend Nextflow through well-defined extension points: functions, observers, executors, and filesystems
- The Nextflow Plugin Registry is the central hub for discovering plugins
- Plugins are declared in
nextflow.configwithplugins { id 'plugin-name@version' } - Import plugin functions with
include { function } from 'plugin/plugin-id'
What's next?
Now that you understand how to use plugins, the following sections show you how to build your own. If you're not interested in plugin development, you can stop here or skip ahead to the Summary.